Buyers glance at honey-oak trim and think "dated." They glance at clean white trim and think "updated." That perception, not a full remodel, is what a weekend of trim work actually fixes.
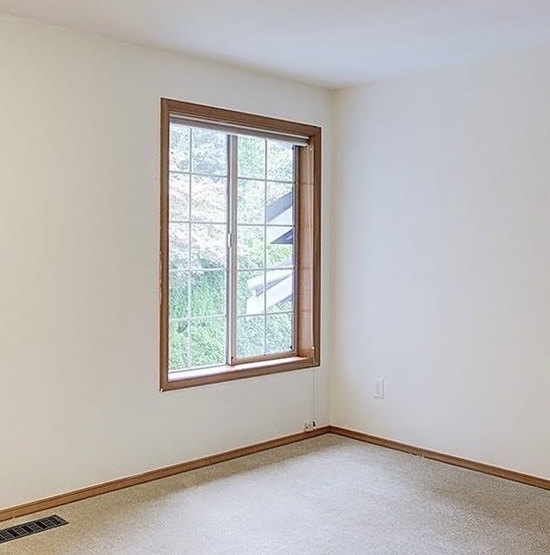
There is a certain look that instantly dates a house in the Seattle and Eastside market: honey wood window trim, skinny baseboards, beige walls, beige carpet, and a room that technically looks clean but still photographs like it belongs to another decade.
The strange part is that buyers often react to that look as if the house needs a major remodel.
It usually doesn't.
Sometimes the difference is a weekend of trim, caulk, paint, and patience.
The market irony is simple: wood can be better, while white painted MDF trim can sell better.
The Before: Nothing Broken, Just Dated
The before photo is a familiar builder-era room. The window is fine. The wall is fine. The space has good light. Nothing here is broken.
But the narrow stained casing and matching baseboard pull the eye straight to the age of the finish. That is the problem with dated trim: it becomes the story of the room.
The After: Same Window, Completely Different Read
The after photo works because it changes the language of the room without changing the structure.
The window gets a wider white surround. The top piece feels more architectural. The sill and apron give the window a finished, built-in look. The baseboard turns white and cleaner. The room suddenly reads closer to the newer Murray Franklyn-style homes buyers recognize across the Eastside: bright trim, clean lines, less visual noise, more intentional finish detail.
The Tricky Part: Building the Top
Most of a window like this is straightforward. The side casing and the sill are simple, repeatable cuts, the kind of thing a patient first-timer can handle. The part that actually trips people up is the top: the built-up header that gives the window its modern, architectural look. Get the sides right and the window looks fine; get the top right and it looks intentional.
So rather than walk through every piece, here is the header build as the worked example, from pre-painted moulding to the finished corner on the wall.
Step 1. Cut and pre-paint the header pieces. The header is built up from a few pieces of finished moulding, cut to length and painted white flat on the floor. Painting before install is faster and gives a cleaner finish than brushing in place.
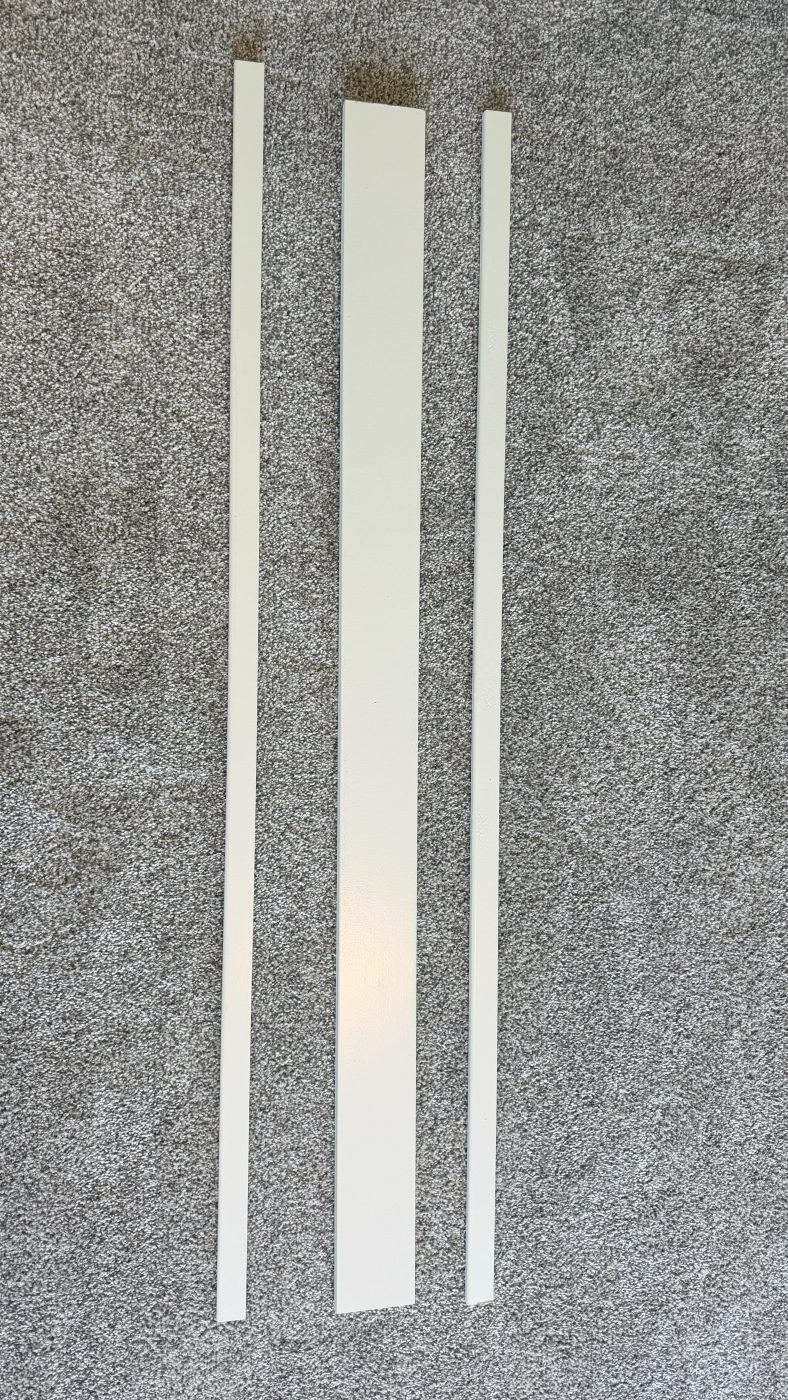
Step 2. Dry-fit the built-up profile. The pieces stack to create depth: a flat band, then a projecting cap on top. Dry-fitting first confirms the reveals and how far the top ledge overhangs before anything is nailed.
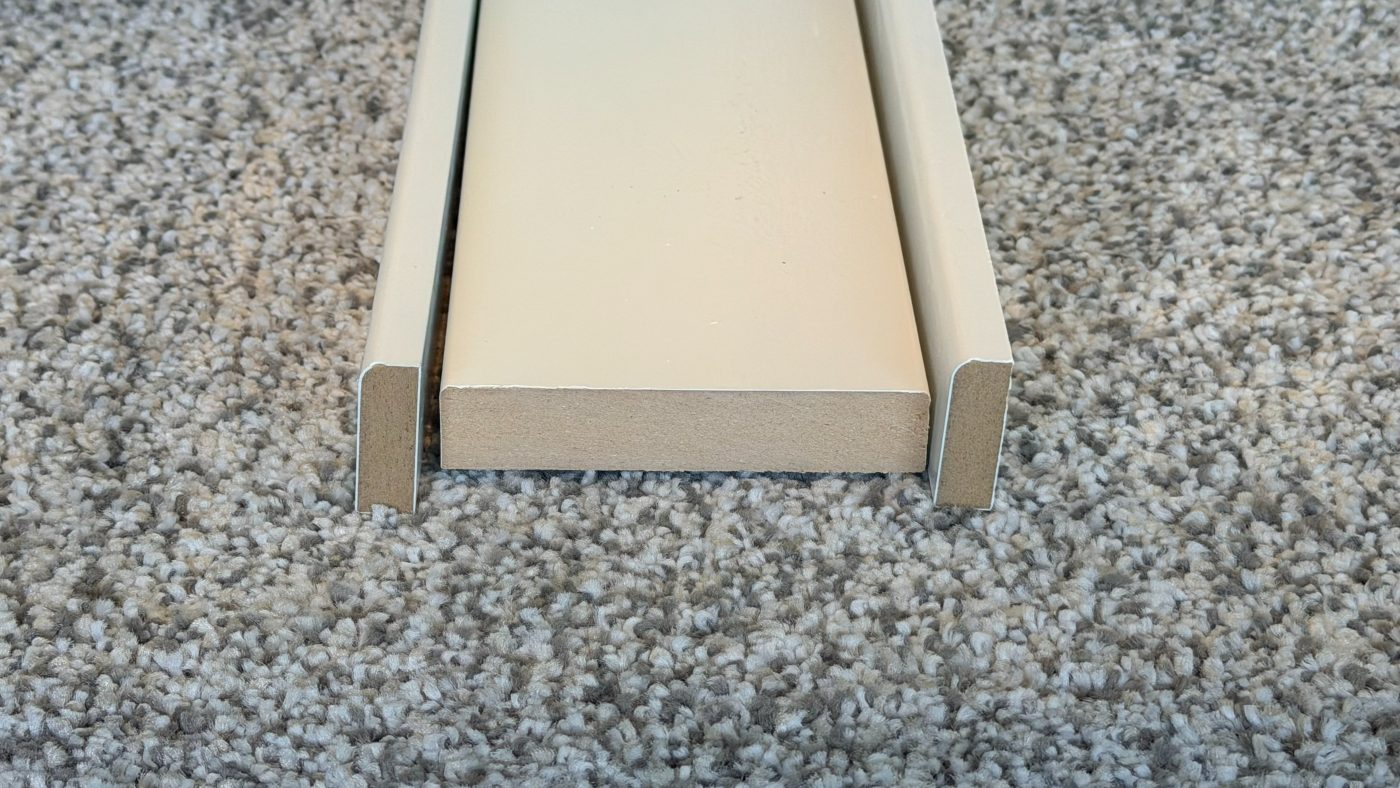
Step 3. Nail up the main band. The wide flat piece goes up first with a brad nailer, sitting just above the side casing. This is the base the rest of the header builds on.
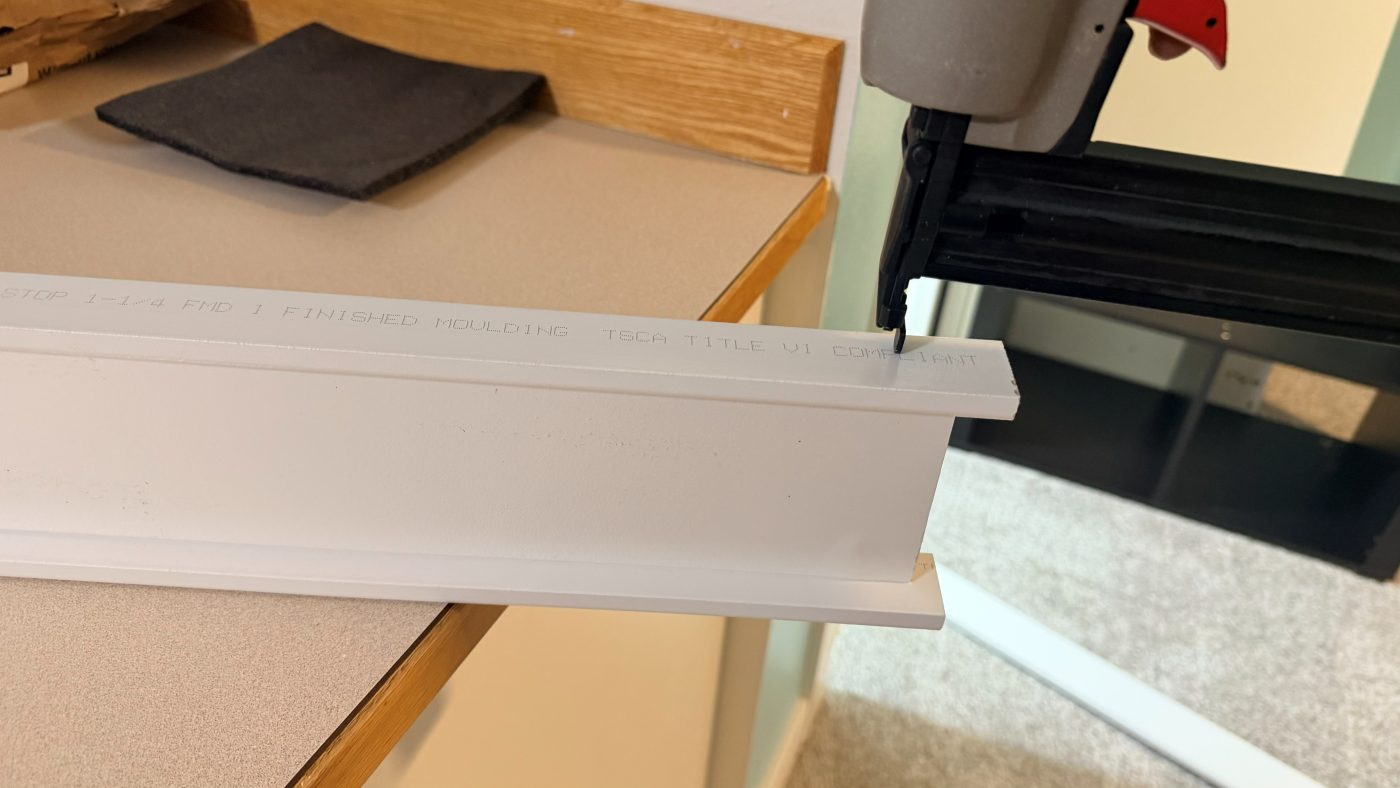
Step 4. Add the projecting cap. The top cap is nailed on last, projecting slightly to throw a shadow line. This overhang is the detail that reads as the modern, builder-style look buyers recognize.
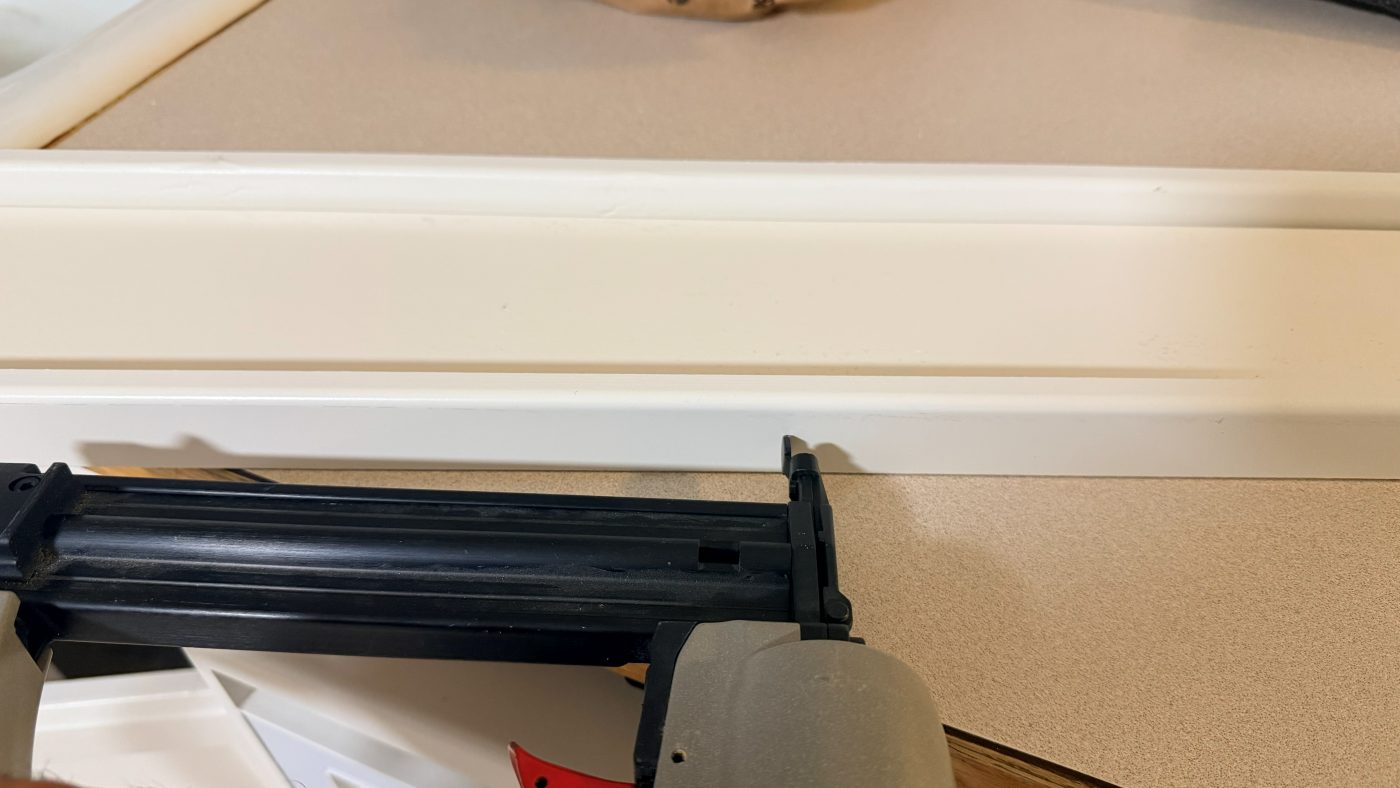
Step 5. Header is up, but not done yet. Nailed in place, it still looks unfinished up close: visible nail holes, raw seams where the pieces meet, gaps against the wall. This is the point most people underestimate. From here it is fill, caulk, sand, and paint, the patient finish work that turns "installed" into "looks like it was always there."
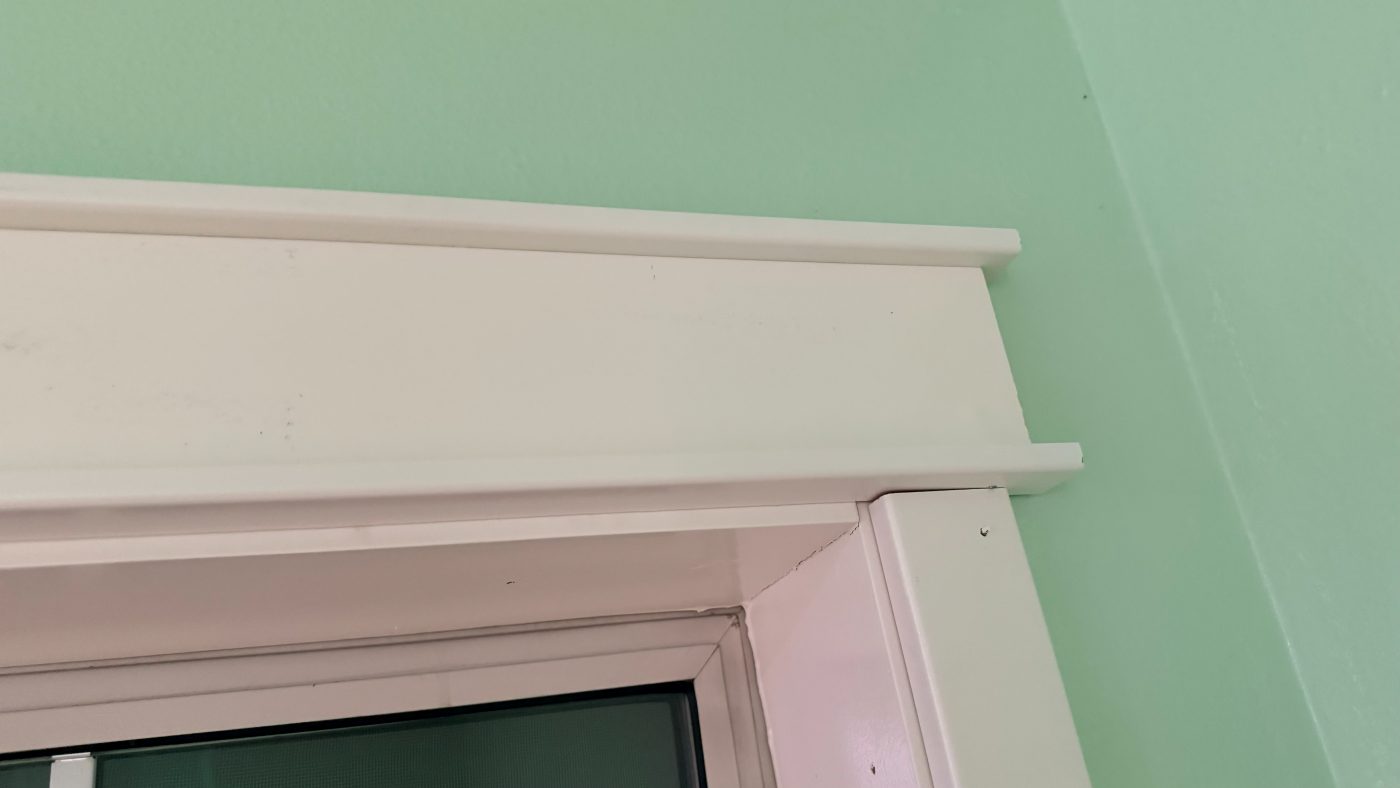
Once that finish work is done, the same window ends up looking like this: the clean, built-in Murray Franklyn look.
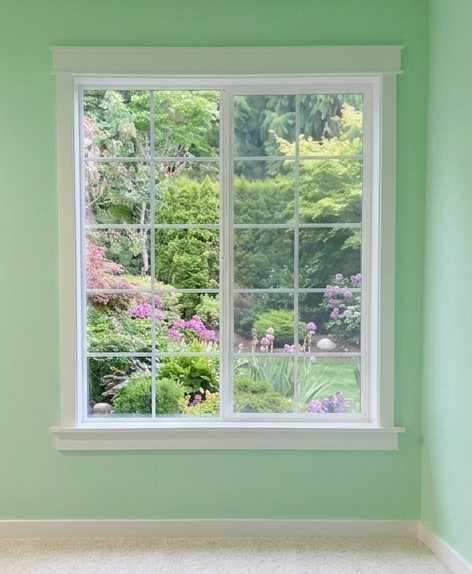
That header is just one step. The rest of the window is more straightforward, and the full sequence looks like this:
- Protect the room, remove curtains or blinds, and clear the work area.
- Score the caulk lines so the old casing does not tear up the drywall.
- Pry off the old stained casing and baseboard carefully.
- Clean up the window edges and repair damaged drywall paper.
- Decide on the reveal around the window before cutting anything.
- Build the sill and apron so the lower detail feels intentional.
- Install the side casing with consistent spacing.
- Build up the top header detail (the part shown in the photos above).
- Replace or paint the baseboard so the room has one clean trim language.
- Fill nail holes, caulk seams, sand, prime where needed, and paint.
A Note on the Material: Wood vs. MDF
One honest caveat, since someone always asks. Old wood trim can be genuinely durable. It dents, but it does not swell like MDF, and it can often be sanded, repaired, and refinished. In pure material terms, real wood has a lot going for it.
MDF trades that for a different advantage: smooth, inexpensive, stable in dry conditions, easy to paint. That is why it became the default in modern production trim. It delivers the clean white look buyers expect at a price builders can actually hit.
The catch is that MDF hates water. A small leak, a wet carpet edge, repeated condensation, a spilled planter, a poorly sealed window: any of them can do damage fast. And once MDF swells, it does not sand back like wood. You replace it.
Why This Works So Well In Listing Photos
Listing photos flatten a room. They punish busy finishes and reward clean contrast. White trim frames the window, brightens the wall, and gives the eye a crisp edge. The room feels cleaner before the buyer has even read the description.
The Seller Math
If a house sits for 30, 45, or 60 days because buyers keep seeing "dated," the eventual price cut can be $25,000, $50,000, or more. That does not mean every trim project creates that much value. But it does mean small prep decisions can have an outsized effect on buyer perception.
A window-trim and baseboard refresh is not about pretending the home is new construction. It is about removing an avoidable objection. If the buyer's first reaction is "this needs work," they discount. If it is "this is clean and updated," they engage.
A Word on Doing It Yourself
DIY is wonderful if you are the kind of person who likes building something tangible that your family can enjoy for years. There is a very real satisfaction in walking past a room and knowing your own hands built it!
But DIY is usually a bad idea if the only goal is to save money. Here is the part people get backwards: they assume DIY work is physically demanding. It really is not, if you have the right tools. The tools are what make the cuts clean and the work painless, and that is exactly the problem. On your first project you are buying the whole workshop, not just the trim, so it can easily cost more than hiring someone.
So here is the honest tally for one window like this:
- Materials: about $200.
- Labor: free, though "free" deserves an asterisk. Instead of working overtime to make Bezos or Musk a little richer, you spent a weekend making something for yourself and your family. Call that a rounding error, or call it the best-spent time of the month.
- Tools and the workshop they demand: priceless. And that word is doing a lot of work, because there is an old rule: never ask a woman her age, never ask to borrow a man's tools, and definitely never ask what they cost.
DIY works best for people who care enough to redo the work when it is wrong. Some people can live with "good enough." Others (including me) will happily tear it out and start over if the result does not match what they pictured. If you are listing soon and you are not that person, hire the right pro.
Before You List, Look For The Cheap Objections
When I walk a home with a seller, this is exactly the kind of thing I look for: low-cost, high-visibility issues that make buyers mentally downgrade the property. Old trim, tired paint, dated light fixtures, brass door hardware, worn carpet in a room that otherwise has good bones. None of those alone makes a house bad. But together, they tell buyers, "You have work to do."
The smarter move is to decide, before listing, which of these are worth fixing. Not every update pays. But clean, modern trim is one of those rare updates that is both inexpensive and highly visible: same basic room, same window, same house, but the after photo tells a completely different story. And in real estate, the story a buyer tells themselves in the first few seconds often decides whether they keep looking.
If you own a home on the Eastside and want a clear-eyed read on which small updates are worth doing before you list, reach out. I will tell you which objections are worth removing and which are not worth your weekend.
Chandru Swaminathan is a real estate broker licensed with eXp Realty, serving buyers and sellers across Bellevue, Kirkland, Redmond, Sammamish, and Seattle's Eastside.
Opinions expressed are those of the author and do not necessarily reflect the views of eXp Realty.